Popular Posts

Driver that works on allmost ALL printers on Linux

After several months of using Linux we found several ways to print on Linux including Windows Printer server...and REVOLUTION... now we found a ultimate driver :D We found that every PPD driver which have sufix "ljet4" will work on Linux. We usually use Samsung QL-5100A ljet4 driver which works on our KONICA MINOLTA printers. Before this our KONICA MINOLTA printers like 15490, 240f, bizhub c10, c352... worked only with Windows Print Server. Now Linux computers can send data directly to printer and it works perfectlly.
You have those drivers installed by default in Ubuntu. Just go to CUPS or Printers , choose your printer and then choose Samsung QL-5100 ljet4 driver and it should work :D Every printer we tried works perfectly. Also if you want to test other printer drivers,or you have specific needs like several trays, grayscale or color display, best way is to try Generic printer drivers first, just keep in mind that those with "lj" in their names are working very well. If you want to printer recognize your paper as monochrome/grayscale you should use ljet5gray or pxlmono drivers. We tried them and they works very well.

UPDATE:
Depending on what type of printer you use you can choose diferent driver which is based on same tehnology:
Printer which must print monochrome use this driver: "Generic PCL5 XL  .ljet5gray", if you want to enter paper manually select in the options "manual feeder", and if you want duplex select "Double side: Yes (flip long-edge)"
If you want to print COLOR you should use driver: HP Color LaserJet cp6015 hpijs pcl3, 3.12.2


What is ljet4?

It is Ghostscript's HP LaserJet 4 (PCL 5e) driver.
"ljet4" is the classical Ghostscript driver for PCL 5e printers. It is probably widely used, as it is part of Ghostscript and does not require any extra software, but before Ghostscript 8.x its output quality was lousy and one has searched for alternative drivers. From Ghostscript 8.x the well-tempered screening was introduced which gives much better quality for half-tone images. You can make use of it by downloading the PPD file for your printer here and using the "HalftoningAlgorithm" option.
Read moreabout ljet4 here: https://www.openprinting.org/driver/ljet4/

Now every printer works on Linux. If driver which aou chosen based on ljet4 doesn't support color printing you should find some model of priner which support color and ljet4 and it should work.
Also you can generate ljet4-like PPD driver on the upper link.
ENJOY :D I will jump over and over... :D

If you still have problems try our solutions before we found this driver:
http://linuxibos.blogspot.com/2012/05/how-to-print-from-linux-without-needing.html
http://linuxibos.blogspot.com/2012/05/seprinters-linux.html

I am sure that this driver works on almost all printers but on apper link are tested those printers:
KONICA MINOLTA bizhub 240f, KONICA MINOLTA c353, Xerox 3220...

This driver works on almost all linux distributions, especually on Debian based like Ubuntu, so Ubuntu 14.10, Ubuntu 15.04, Ubuntu 15.10...

Printers and Linux - How to find drivers, install, setup

If printer is not working , and you need it, your system is almost unusable.
Because that we will now explain you how to setup ALL of printers you could have in your life. 

Content:


1.Setup CUPS
2.Install Linux printer on Windows
3.Install Linux printer drivers
4.Linux printers tips and tricks
5.What to do when there is no Linux printer support


Firstly, Linux supports natively most of printers. If you're buying new printer ask for Linux support, or just buy HP printer :), BEST support for Linux have HP printers, they have a lot of programs to configure and maintain printers. Also we recommend Lexmark and Xerox. If you have some Xerox printer and it is not working please go to Xerox web page and try to download driver, if you are unable to do that try driver for some other xerox printer with similar characteristics. We tried a lot of xerox printer, they all works , but none of them was working with native driver. KONICA MINOLTA is the worst one, they didn't have any support for Linux. But we have solution for that :) . Epson printers are quite well, we didn't test a lot of them but everyone we tested worked well after some tweaks. I tested all this on Ubuntu 11.04 , Ubuntu 12.04 , Ubuntu 12.10 and its derivates like Kubuntu, Lubuntu, Zorin , Mint ... It should work on Ubuntu 14.10, Ubuntu 15.10, Ubuntu 15.4...

1.Setup CUPS


The fisrt thing you must have in your distro for better printer support is CUPS. Today almost all distros come with it preinstalled. And that mean that every computer which have CUPS behave like printer server. What that mean to you? A lot of GOOD things.

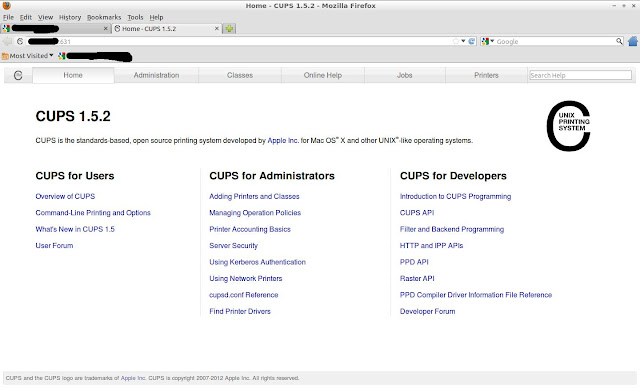
When you enter in your browser IP address of your Linux computer and add port 631 for example: http://192.168.1.7:631 will be open web page of CUPS where you can configure printer server.

Start page of CUPS server.You can open it from any computer in your LAN.
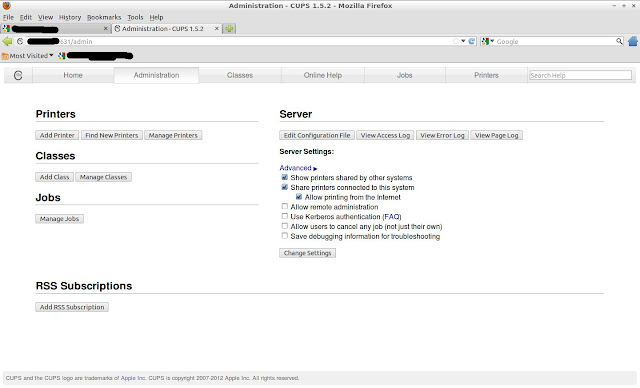
 If you add sufix "admin" on adress for example: http://192.168.1.7:631/admin you will get this:
Here you can setup main setting of CUPS. If you select same settings showed on picture you printer will be seen on on computers.

Depending on your setting computer around you will see your printer and you will see theirs printers. It is simple. When you configure it click on "Printers" or add sufix "printers" on address and you will get list of accessible printers.


2.Install Linux printer on Windows


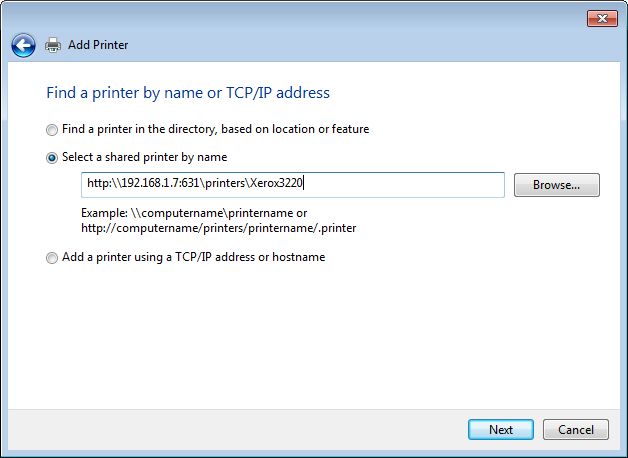
If you have some Windows computer in LAN you can easily add Linux printer on Windows by adding http URL, just copy url of printer from page in upper picture and new network printer:
Add printer URL, then choose driver..adn NEXT,NEXT...FINISH


3.Install Linux printer drivers


 Now lets go install Linux printers.

First, try to install printer with drivers which  comes with Linux distribution, if they don't work then try to find PPD driver on the internet. Here is some pages to find PPD:
Drivers for most printers
HP
Kyocera
Xerox
Most Linux drivers and install manuals
Ubuntu guide to printers

PPD file tels Linux what features printer have and how to use it. It is simple tekst file which can be easily created if you know how to do it... here is manual how to create PPD.
When you find PPD file then you have  to install it:

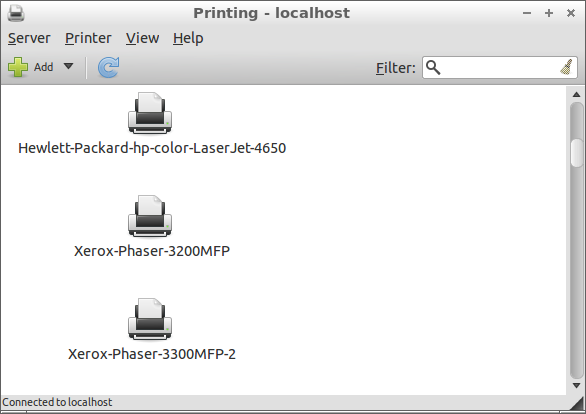
Run the system-config-printer python script. You can do it by starting icon "Printing" in Setting on your system menu  or you can type in console system-config-printer , or type ALT-F2 and type system-config-printer.
Click "Add". Bellow is list of installed local or shared printers.
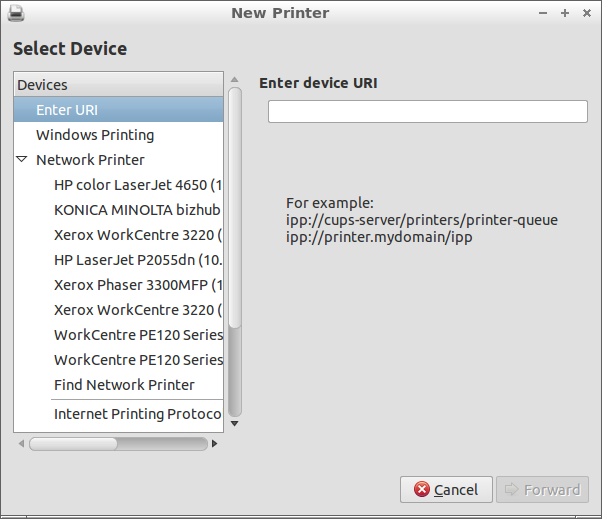
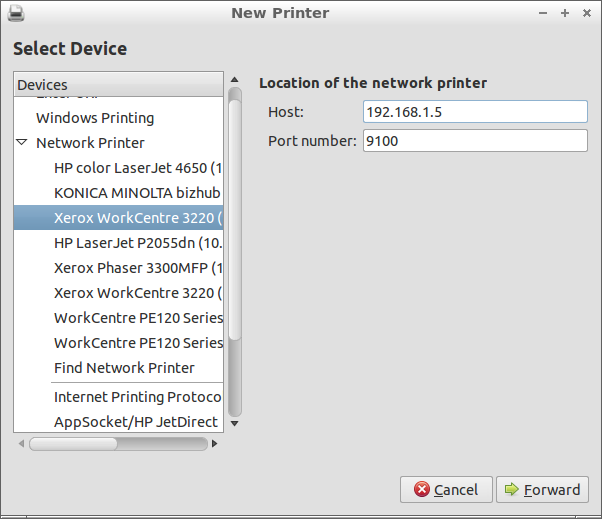
Choose network or local printer, or enter url, ip... to find it.
When you click shared printer, IP and port will appear on the right screen.Click "Forward" then.
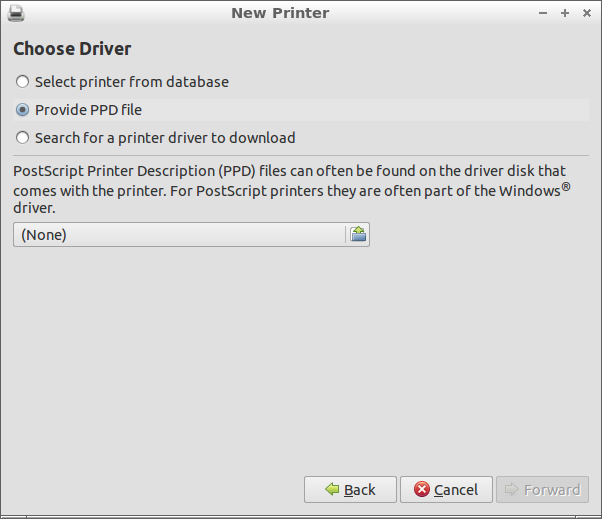
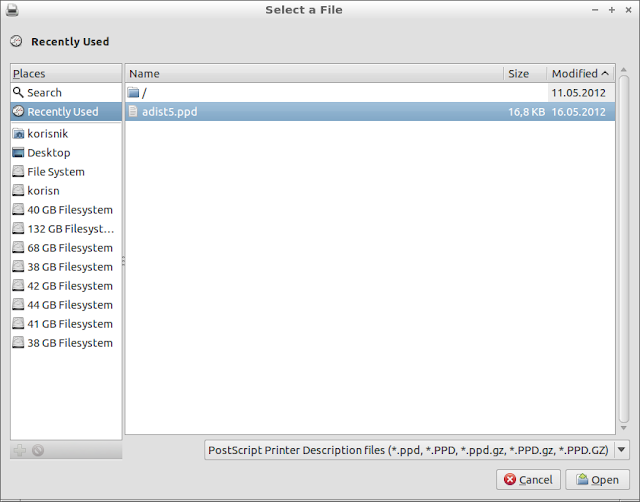
If you first time see this window click "Select printer from database" and select it, and if you didn' succeded click "Provide PPD file"  and click on bellow button labeled "(None)".Click "Forward" after next step.

Choose your PPD driver (On picture is virtual driver, which will NOT work,here is just for example)

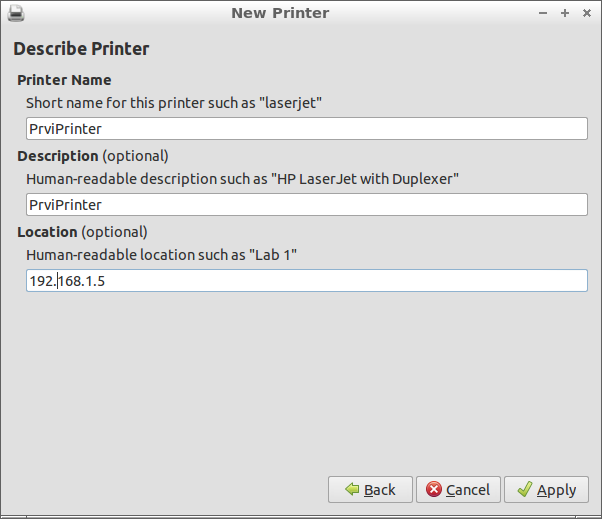
Enter the name of printer. You can enter everything.
After this you can click "Properties" on printer , and click "Print Test Page" to see is it working.

Most printer will be succesfully installed with upper instructions, but if it still doesn't work continue reading.


4.Linux printers tips and tricks


Here are some tweaks for some printers to get it working:

HP color Laser Jet 4650 needs to be installed by second driver in list because first(which is recommended by system) works but everything you print it prints three times... you want to print two pages...it print out six pages. Choosing second driver solves this problem.
Xerox workcenter 3220 must be installed with driver from Xerox webpage.
Xerox Phaser 3200MFP  works with "Generic PostScript Printer Foomatic/Postscript" driver (Second on recommended list)
Xerox workcenter PE220 will work with driver Xerox PE144e
Xerox workcenter PE120 will work with driver Xerox PE144e
EPSON LQ-680 will work with 24-pin driver , you must set 180DPI to print properly
EPSON LQ-690 will work with EPSON 570+ driver , you must set 180DPI to print properly
If  you connecting EPSON printer with LPT-USB adapter it will NOT work properly, it will behave CRAZY. You must use LPT-LPT or USB-USB cabel. This one takes week of my work to configure it...

UPDATE: We found driver for Linux which works on almost ALL PRINTERS including KONICA MINOLTA, XEROX, LEXMARK, EPSON..., read more here: http://linuxibos.blogspot.com/2013/01/driver-that-works-on-allmost-all.html 

5.What to do when there is no Linux printer support


If you have KONICA MINOLTA printer or some other printer which don't work you must create Printer server with Windows. It is enough to have only one XP or Win7 machine in whole company. You can connect hundred printers on this printer server. BUT Microsoft printer server which comes with Windows Server CANNOT work with Linux. You must do some configuration tweaks. We worked very hard to solve this problem. After days and days we created our custom printer server in C# which runs on one Windows XP. On Windows XP machine you must install drivers for printers, and start printer server. That is allmost all what you need to do.... This server enables you to print from Linux to any printer WITHOUT LINUX DRIVERS.

If you want to go throught all process alone here is link:
HOWTO - Print to a windows printer from linux WITHOUT needing any linux printer drivers_PPDs

To run printer guided by upper link you must install ghostscript to manage printers and python to automate whole process.

If you want to try our solution you can go to sourceforge to download, you can also contribute project and create your own code.

You can download printer server on this link: https://sourceforge.net/projects/nolindrivers/files/latest/download?source=files 

Full tutorial for installing our printer server is here.
If you have problems with installing our custom printer server named NoLinDriver printer server leave comment here, and we will try to explain it better.

I think that this post covers all your printer problems, if someone have problems with some of these please tell me that , and leave comment :)

Install Openfire chat server communicator on Linux Ubuntu 12.04 or 12.10

If you need LAN communicator or intern communicator on which you can connect from internet, on which you can edit groups, rooms, users ... everything you need to do with instant messaging protocol... you should try openfire.
Her is full tutorial how to install/setup openfire on ubuntu 12.04. or 12.10 Tutorial is needed because openfire non-opendsource  java runtime , and that java runtime you can't install without some tweaks.
It should work on Ubuntu 15.04, Ubuntu 15.10...
For example I installed Ubuntu 12.04 LTS Server in VirtualBox. I choose all default options, and I didn't install any server feature, you don't need it. We will install all by entering commands in command line / terminal. Only thing you need is java, which we will install later.

This is my fresh installed Ubuntu 12.04 LTS Server

Now we will download script which will enable us to install java.
You can download script from HERE.
When you download it , extract it with syntax: tar -xzvf filename.tar.gz

You will get this:
Content of sript which will enable us to instal sun java.
Then enter command: sudo bash oab-java6.sh
And it will start working... it will tako some time...
Script is installing

When it is done you can install sun java: apt-get install sun-java6-jdk

After installing is done you can check your java version: java -version

After this you can install openfire program.
First download openfire:  wget http://download.igniterealtime.org/openfire/openfire_3.7.1_all.deb

And after downloading install it: dpkg -i openfire_3.7.1_all.deb


After this step you can access openfire server by web page, enter(change IP to your server IP) in browser: http:\\192.168.1.30:9090

If you see this it means that openfire is sucesfully instaled.


 Openfire have intern database which you can use for data storage of openfire data but it can bee slow after some time, so you can install mysql and connect openfire to mysql, enter commands:
#mysql -u root -p
mysql > CREATE DATABASE openfire;
mysql > quit;


And select "Standard Database Connection" on Databse Settings page, I choose Embedded database beacuse I have already some data in it.


 And after some few steps you are ready to use openfire!

UPDATE: If you have problems with low memory in Openfire and if it stops frequently you should do those steps: http://linuxibos.blogspot.com/2013/02/openfire-chat-server-out-of-memory.html


How to print from linux WITHOUT needing any linux printer drivers or PPDs.

If you are one of many users who have one Windows computer in LAN and lot of Linux computer and lot of printers which don't work with Linux we have solution.
After some googling we found page that explain how to print on Windows printer from Linux machine without any driver or PPD needed. You can red it here. But it is to hard to confiugure for most of users, it supports only one printer on one computer, and it is hard to manage. We created program which is doing same thing much better and easier.
We created NoLinuxDriver printer server in C# which you can download from here.
We also created automated script for Linux which installs for you everything needed for printer to work, so you don't need to do anything  else.

How to install printer server on Windows:

  1. Install printer on your Windows machine. It can be any Windows machine which supports .NET 2.0 framework.
  2. Download printer server from here and unzip it somewhere.
  3. Install AFPL Ghostscript from http://www.cs.wisc.edu/~ghost/
  4. Install GSview from http://www.cs.wisc.edu/~ghost/ 
  5. Create shortcut of  PrinterLinuxServer.exe  and move it to Programs->Startup so it will run on startup.
  6. Start PrinterLinuxServer.exe and click refresh.
  7. Go to C:/printers/ and right click on folder named by your printer.
  8. Click Sharing and share that folder, choose people who can access it, if you don' know you can choose Everyone and you must enable them to read and write.
  9. That is all for Windows :)
Go to your Linux machine:

  1.  Download printer server from here and unzip it to your home folder for example '/home/juser/printer' .
  2.  Go to folder where you extracted  server and opet "auth" file. Change your username, password and domain.
  3. Open install.sh file and change the name of your printer (red colored) and IP adress(pink colored) of your server and your shared folder. #!/bin/bash
    cp adist5.ppd /usr/share/cups/model/
    cp winp /usr/lib/cups/backend/
    cp auth /usr/lib/cups/backend/
    chmod +x  /usr/lib/cups/backend/winp
    mkdir /var/spool/winp
    chmod 777  /var/spool/winp
    lpadmin -p minolta163 -E -v winp://192.168.1.8/minolta163 -m adist5.ppd
  4. Open terminal.
  5. Go to folder where you extracted  server and type: sudo bash install.sh
  6. Run system-printer-config , choose your printer and run Test page.
  7. Thats all :)
When you click print on Linux, winp will send *.ps file to windows shared folder and when server recognize .ps file it will print it instantly.
It looks like this:

On left side is list of printers, on right is log file which tels you what was printed and what command was executed to print.

Please leave comment if you have questions.

UPDATE: We found driver for Linux which works on almost ALL PRINTERS including KONICA MINOLTA, XEROX, LEXMARK, EPSON..., read more here: http://linuxibos.blogspot.com/2013/01/driver-that-works-on-allmost-all.html 

Change TeamViewer Client ID on Cloned Linux machine

If you have remastered Linux with included TeamViewer or if you cloned your Linux distribution and all programs and setting you will be faced with problem that all your cloned, preinstalled machines will have the same ClientID number.

You can solve this easily by removing teamviewer settings.
Open terminal and enter this command: rm -r ~/.teamviewer

It will delete all teamviewer setting , but they will be back after you start teamviewer, and there will be new ClientID. Sometimes you must wait several minutes to gain new ID number and password.

UPDATE: On TeamViewer 9, and probably 8 as well, stop the teamviewer daemon, remove the /opt/teamviewer9/config directory and restart the daemon.


Openfire chat server Out of memory problem

If your Openfire chat server stops after few days and says "Out of memory" you have several thing to do, some of them solved problem, but if you do it all and update Openfire it should stop showing error.
1. Add system property: cache.username2roster.maxLifetime = 419430400
2. Add system property: xmpp.pep.enabled = false
3. You can increase memory for Java. Add a line like this in file /etc/sysconfig/openfire : OPENFIRE_OPTS="-Xms256m -Xmx512m"
You can increase memory as much as you can, so if you have 2GB of memory you can set: OPENFIRE_OPTS="-Xms512m -Xmx1024m" .
Also you can do this by sending parameter to openfire.You must first find the command that starts Java and add this command line parameter: -Xmx<size>
For example, use -Xmx256m to let Java use 256 MB of memory. The full command might be something like /path/to/java -Xmx256m -jar openfire.jar

That should solve your issue with low memory in Java Openfire Jabber chat server.  

Installing BIRT Viewer server and BIRT report designer

If you want to use BIRT reporting as alternative to Microsoft SSRS you can easily do it by instaling BIRT on any linux distro. There are several tricks you have to do before everything will be fine. We will show you how to install BIRT Eclipse designer, BIRT Runtime server with apache 2 and tomcat 7 and how to add mysql JDBC driver to Eclipse so you can add dataset to BIRT reports and connect to data.

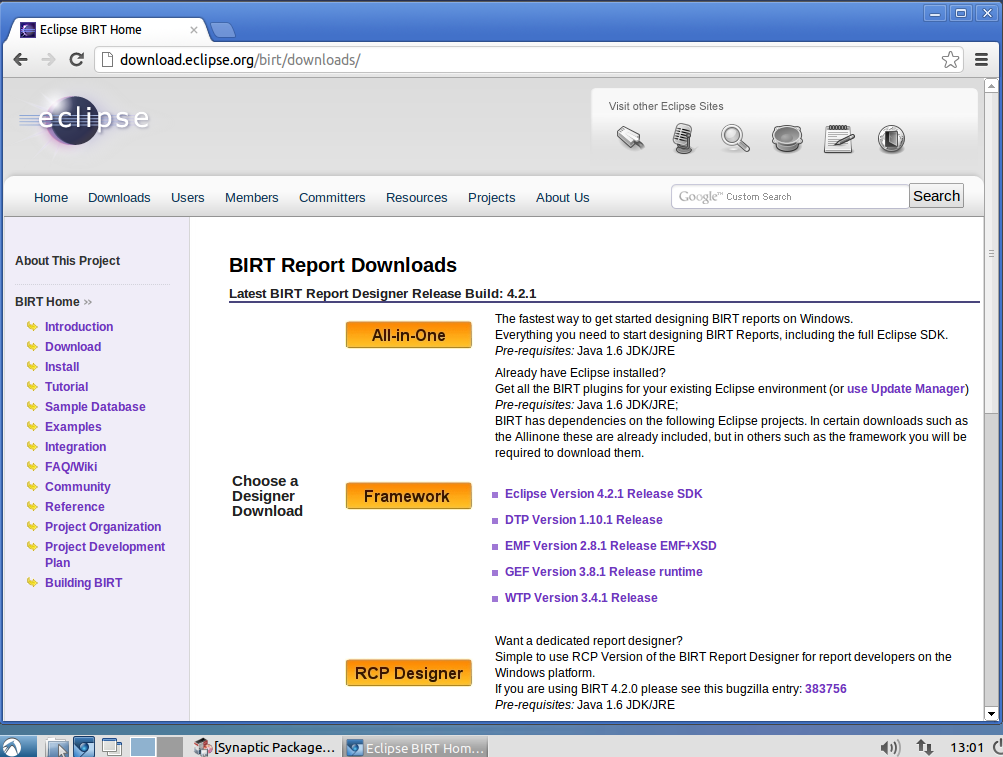
First you must download Eclipse IDE, you can download it from here:http://download.eclipse.org/birt/downloads/

Choose All in one
On the same page you can download BIRT runtime, runtime is important because apache and tomcat use birt runtime to run your reports like SSRS and it is like BIRT Report Viewer.
Here is link(I recommend you to go to main web page and download latest): http://www.eclipse.org/downloads/download.php?file=/birt/downloads/drops/R-R1-4_2_1-201209181113/birt-runtime-4_2_1.zip


Also download Latest BIRT Runtime


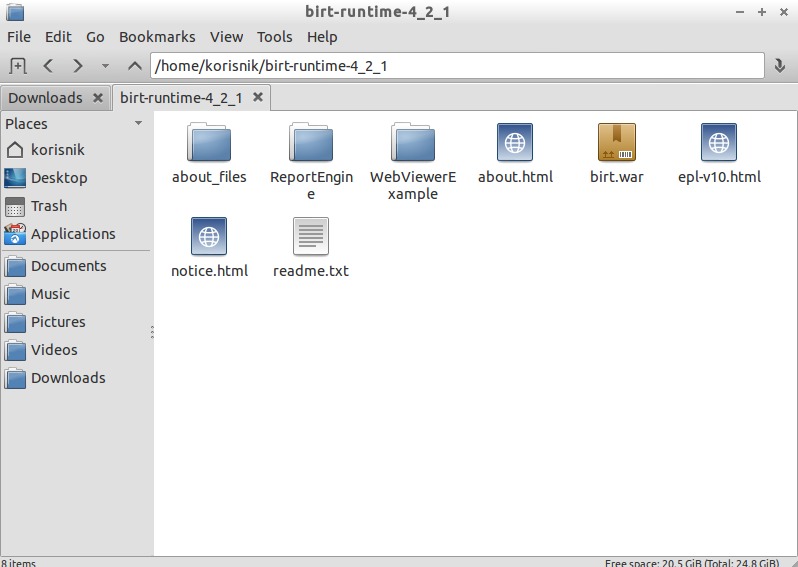
After you download package extract it somewhere on your disk so you can easily access it later.

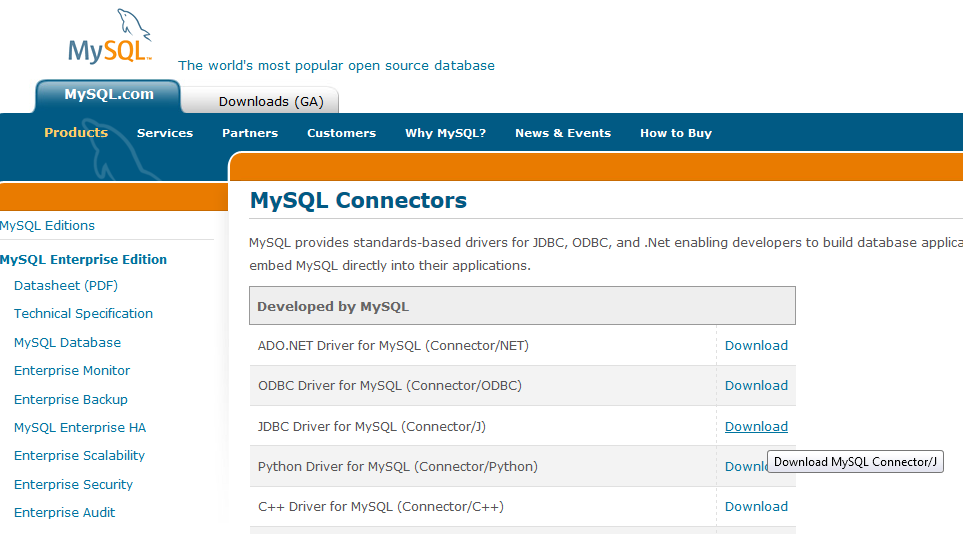
Now download MySQL JDBC driver for Eclipse and Java so you can make connection to MySql database. Here is link: https://www.mysql.com/downloads/connector/j/

Download JDBC MySQL driver


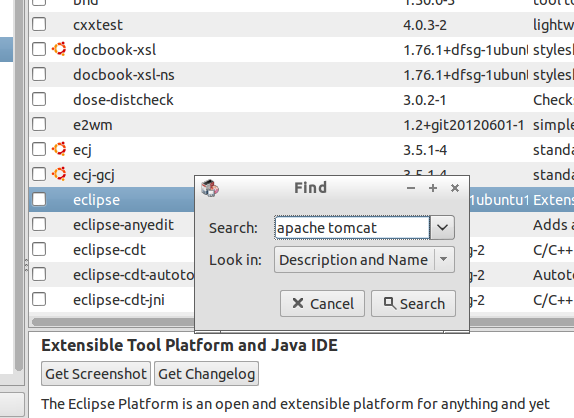
Now install apache2 and tomcat7 on your Linux distro. Here we use Ubuntu derivate Lubuntu 12.10. But the same thing is for Mint, Snow, Lubuntu, Kubuntu, Xubuntu, Ubvuntu Server and versions Ubuntu 10.10 , Ubuntu 10.04 LTS, Ubuntu, 11.04, Ubuntu 11.10, Ubuntu 12.04, Ubuntu 12.10....

Installing in Synaptic


When you finished installing apache and tomcat you must configure it.
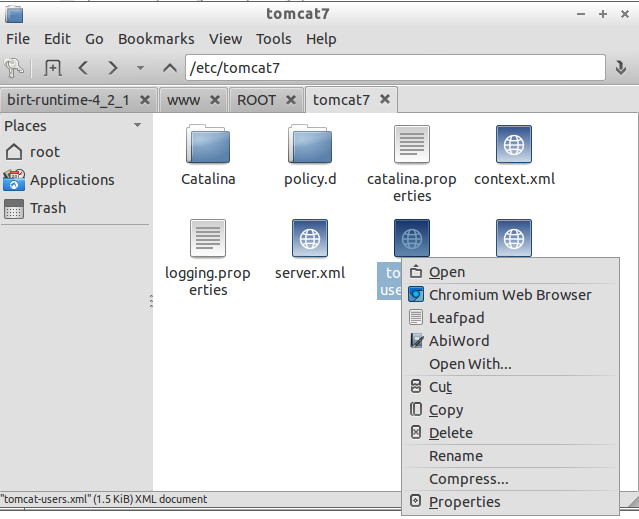
Open /etc/tomcat7 folder and open file tomcat-users.xml with root permisions.


Open it in some text editor, remmember that you must be root to edit this file!
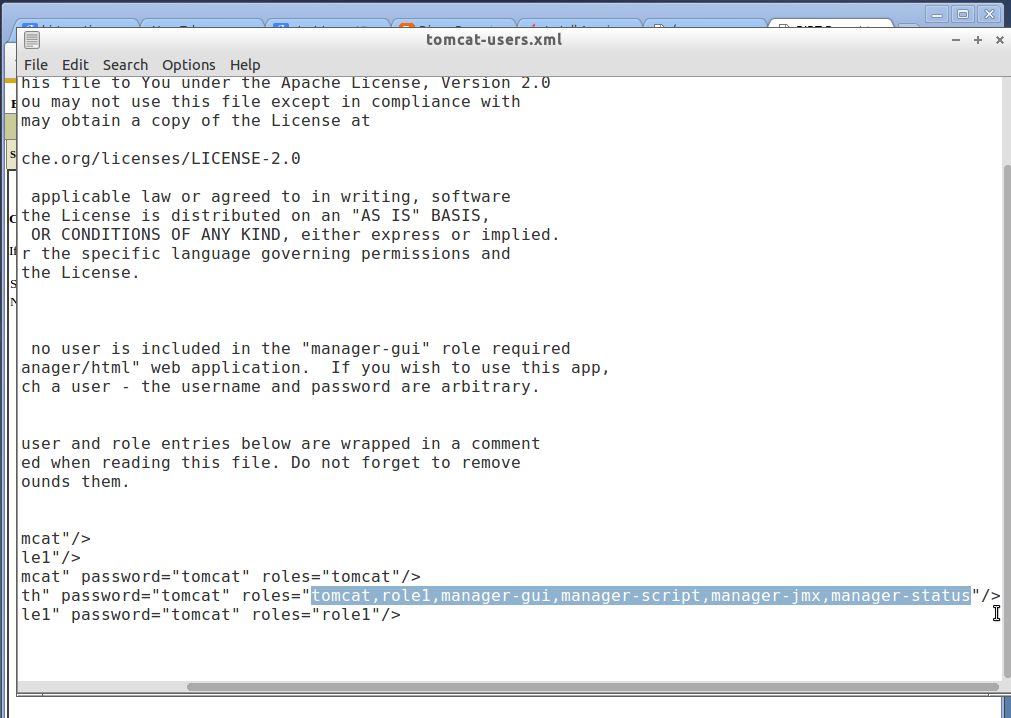
Uncomment lines on botton and add selected roles to your user.
In file tomcat-users.xml go to bottom and you will see default users config commented. Uncoment it , add your users and add roles to your admin user. Add this roles: manager-gui, manager-script, manager-jmx, manager-status.

Then restart tomcat. Enter command: sudo service tomcat7 restart


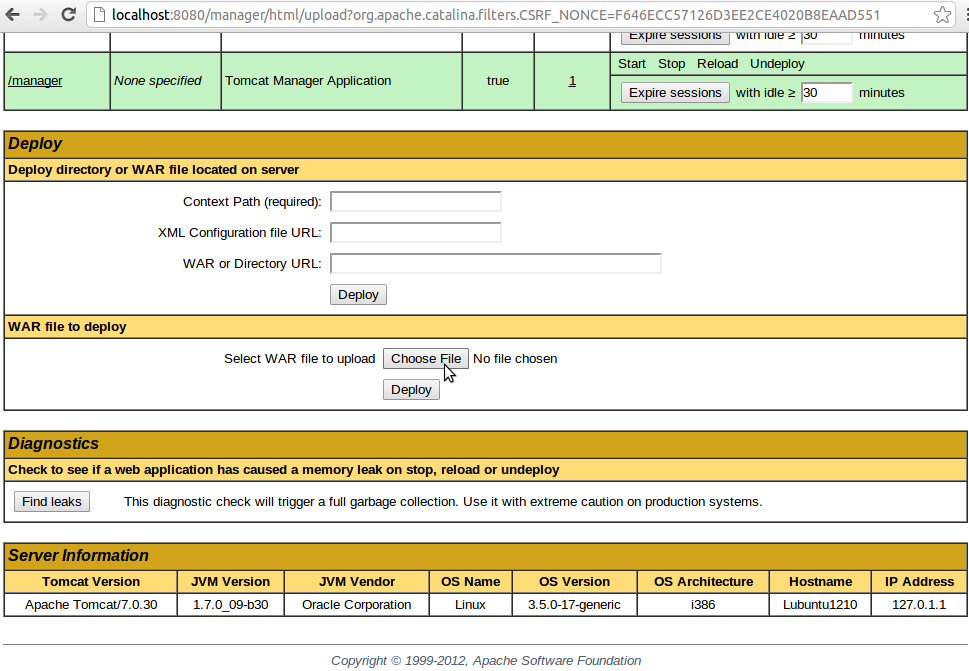
Now go to http://localhost:8080/manager/html and enter password you entered in tomcat-users.xml file. DON'T enter localhost instead localhost:8080 because tomcat runs only on localhost:8080. You can change that later of course but that is default. 

Click "Choose File"

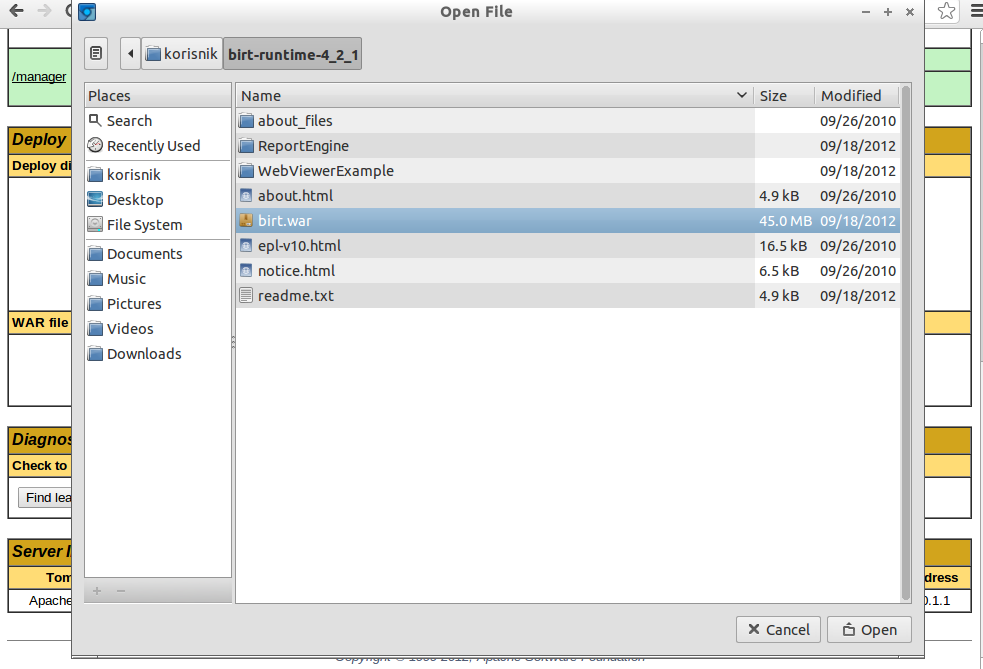
Choose birt.war in folder of BIRT runtime
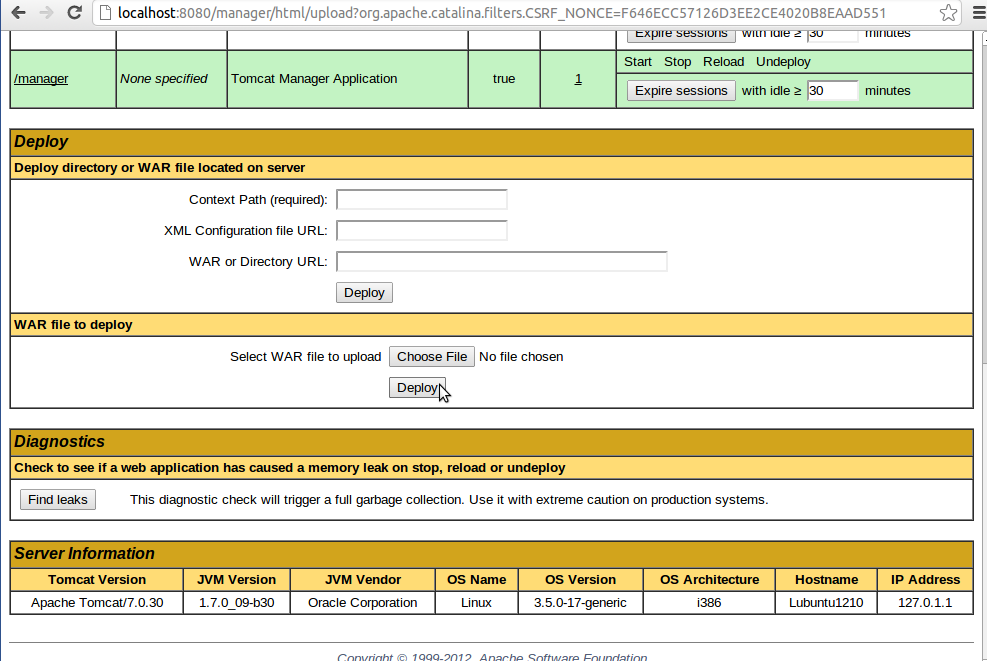
Then click "Deploy" to deploy BIRT Viewer nad make it active.


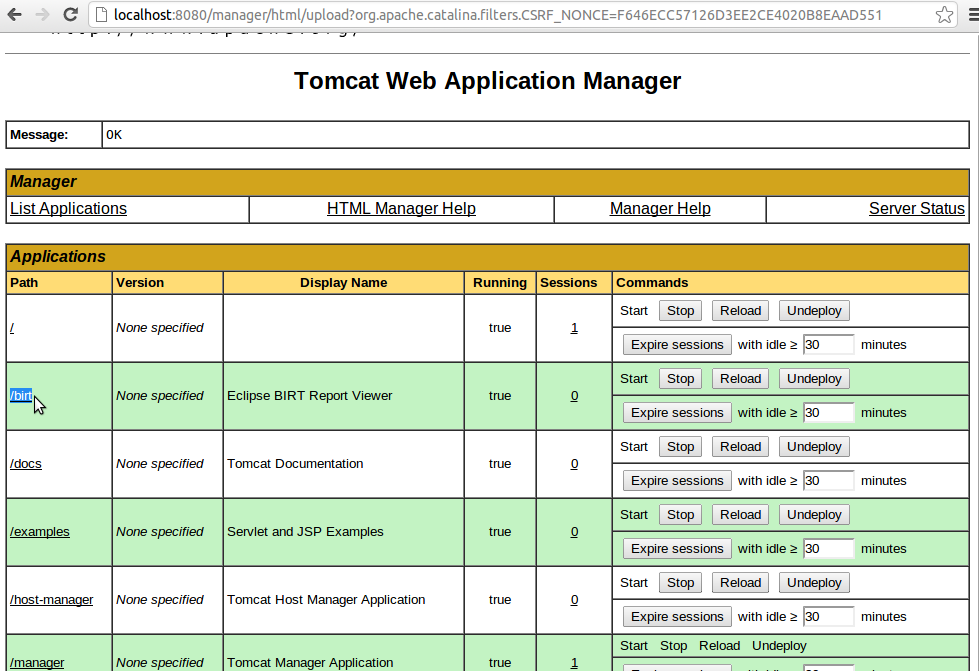
You can see BIRT installed when you refresh localhost:8080/manager/html

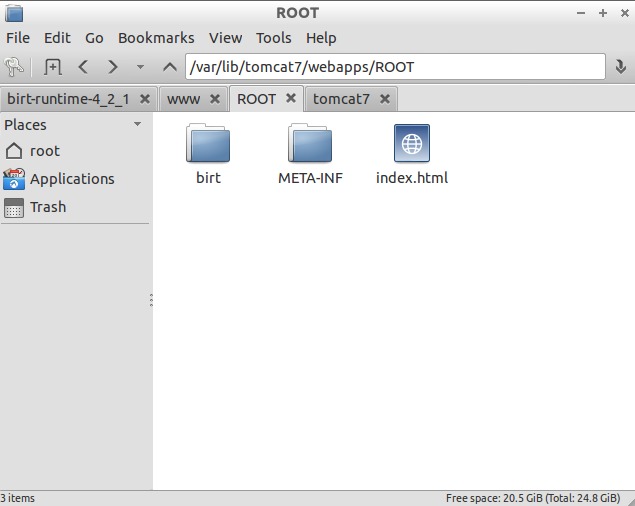
Copy WebViewerExample to /var/lib/tomcat7/webapps/ROOT

When you copy WebViewerExample to /var/lib/tomcat7/webapps/ROOT, RENAME folder  to birt.


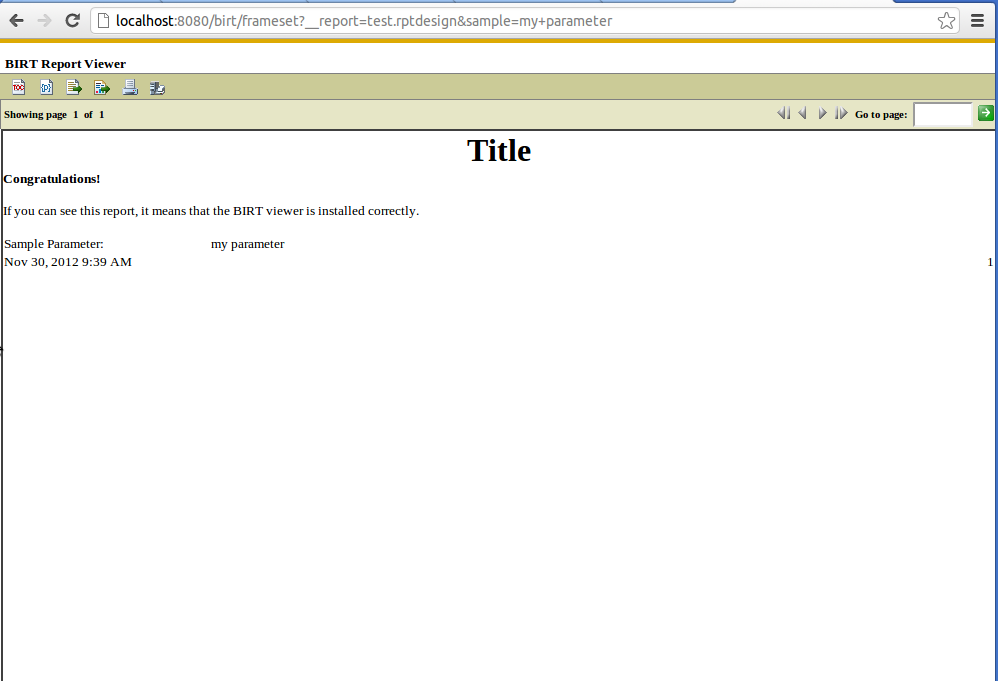
Now open http://localhost:8080/birt and then click View Example. It should display you something like this:
BIRT Report Example


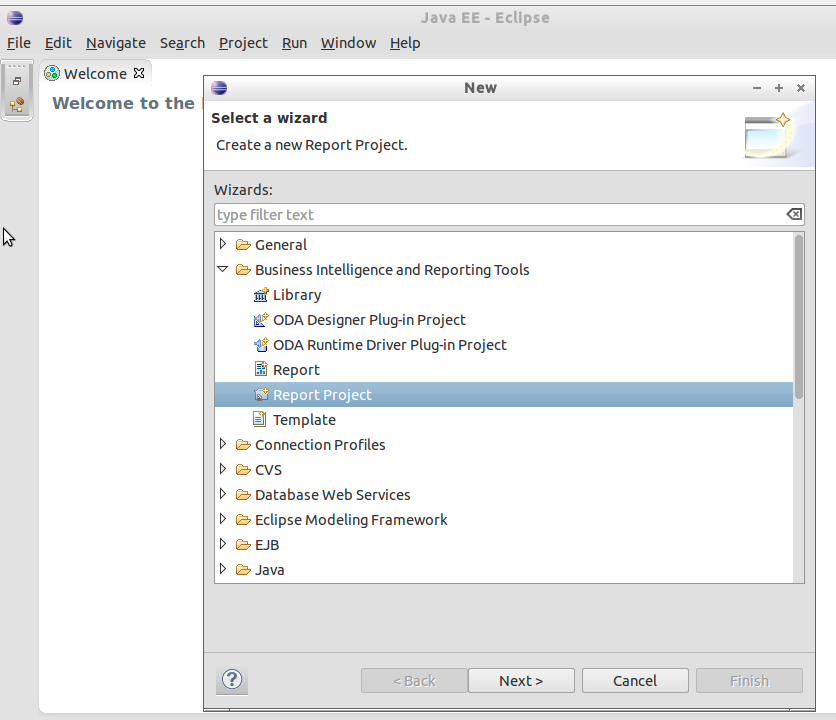
Now open Eclipse from the location where you extracted it, you don't have to install it , just run the file eclipse. After that Go to File-> New->Other...


Choose Bussines Intelligence and Reporting Tools , and then Report Project


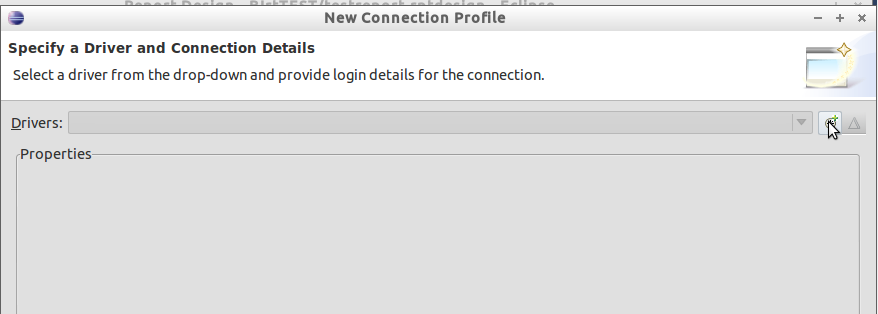
Click on button in right upper corner

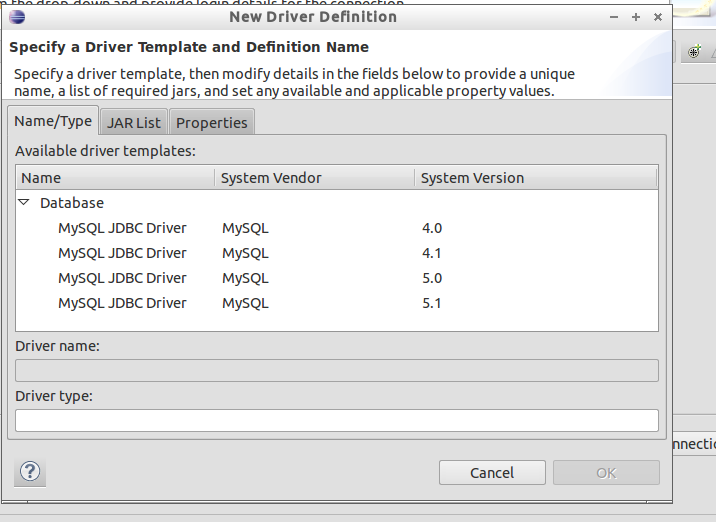
Choose MySQL JDBC Driver Version 5.1
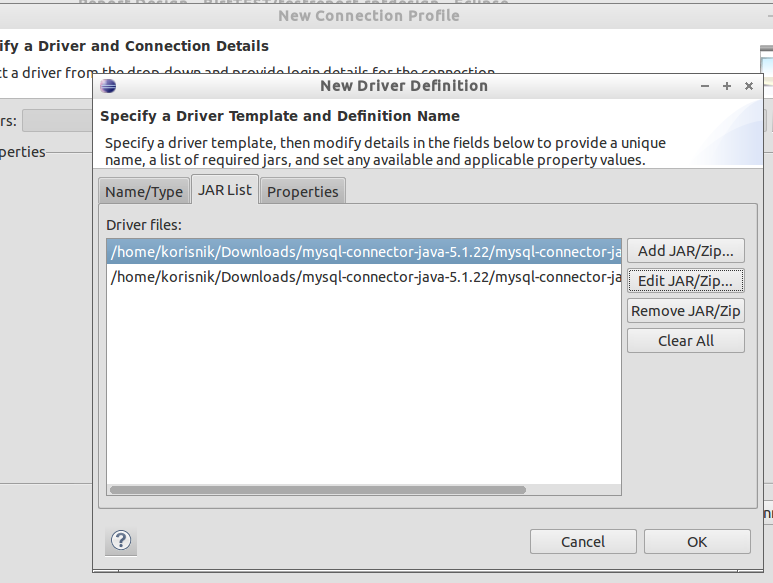
Click "Edit JAR/Zip"

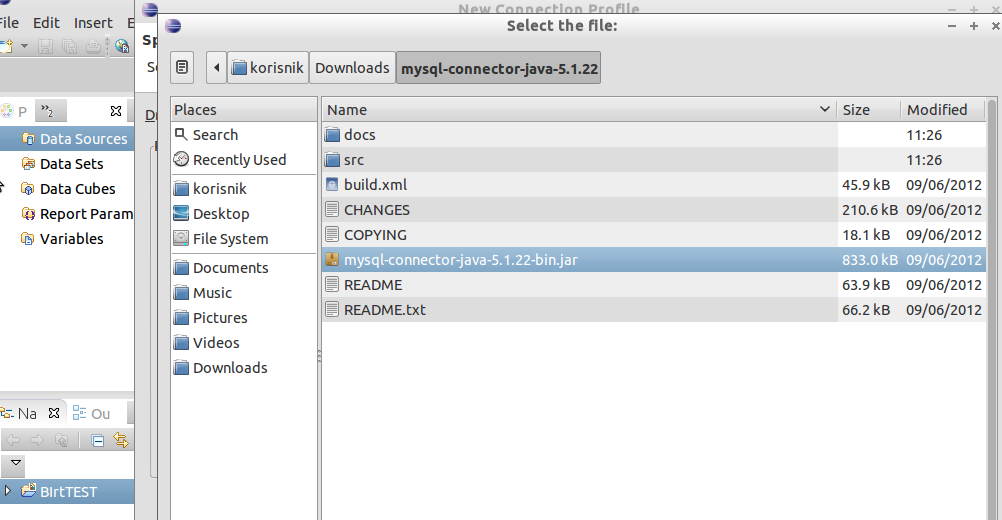
Choose mysql-connector-java you downloaded and extracted previously at begining of this tutorial


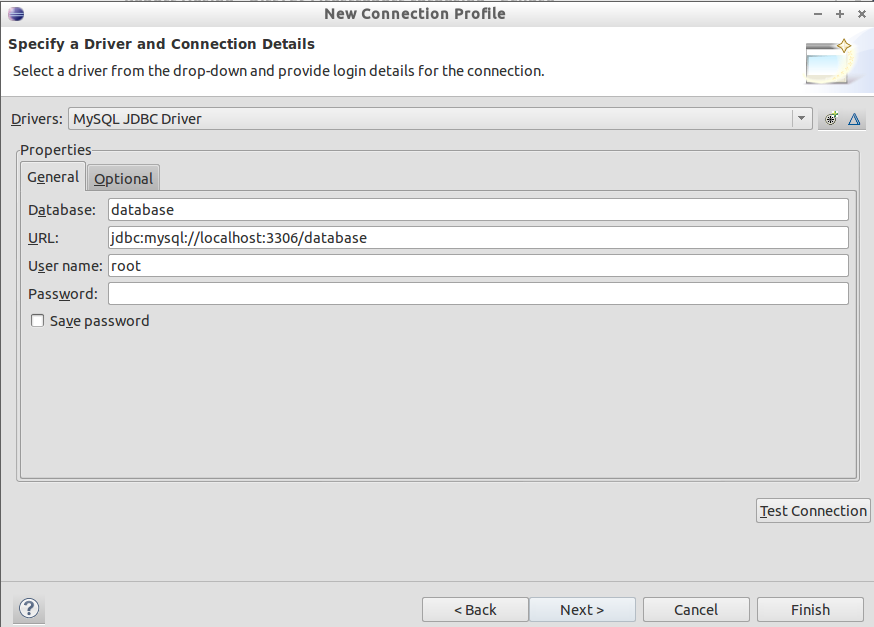
Set connection string to database


.... now design report and enjoy :)